
A virtual environment in Python is a self-contained directory tree that includes a Python installation and a number of additional packages. Its main purpose is to keep dependencies required by different projects in separate places, by creating isolated python virtual environments for them. This is one of the most effective tools to manage dependencies and avoid conflicts between project requirements.
The reason to use virtual environment for development and why they can be useful are as follows:
- Isolation : Each virtual environment has its own Python runtime environment. This means that different projects can use different versions of Python and different sets of packages without interfering with each other. For example, Project A can use Django 2.0 while Project B uses Django 3.0, and they won’t conflict.
- Dependency Management : You can have different versions of the same package in different virtual environments. This is particularly useful when you’re working on multiple projects, each of which depends on different versions of a library.
- Simplified Deployment: Virtual environments help you understand what dependencies your project has, which simplifies deployment. You can freeze your environment (e.g., using
pip freeze) to create a requirements file, making it easy to replicate the environment elsewhere. - Development and Testing: They allow you to test your projects in clean environments, starting from scratch. This ensures that your project works on a fresh installation, and you haven’t missed any critical dependencies.
How to Create and Use a Virtual Environment in Python:
- Install python : Make sure you have python installed in your pc. If not you can download the latest version of python here.
You can check the version of the installed python in your pc with following command:
python --version
- Install pip : In order to setup venv you will also need to have pip installed. If you have not installed pip you can install following the guide here.
You can check the version of the pip via following command:
pip --version
- Install Virtualenv : After having python and pip installed, you can now install virtualenv via pip running following command:
pip install virtualenv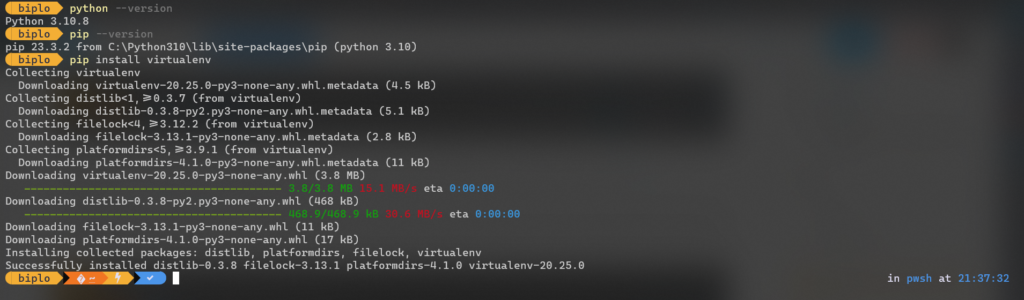
You have successfully installed virtualenv 🎉
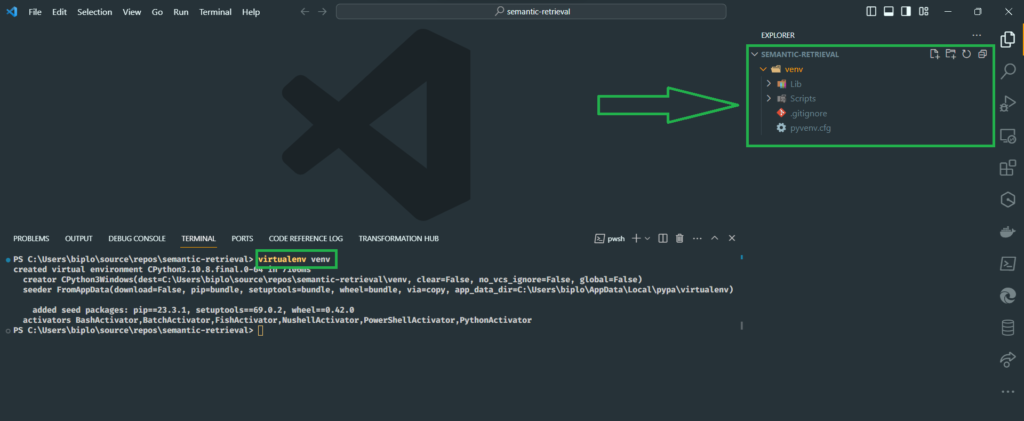
After having virtual environment installed you can navigate to your project’s directory and and run:
virtualenv venv
For this demo I created a folder called semantic-retrieval in my pc and ran virtualenv venv command. You can see the folders that were generated inside the directory.
To activate the virtualenv run following commands
On windows run:
.\venv\Scripts\activate
On macOS and Linux, run:
source venv/bin/activate
You will see (venv) in your command line as shown in image below after the venv is activated

Happy Coding 🍻